The Slide
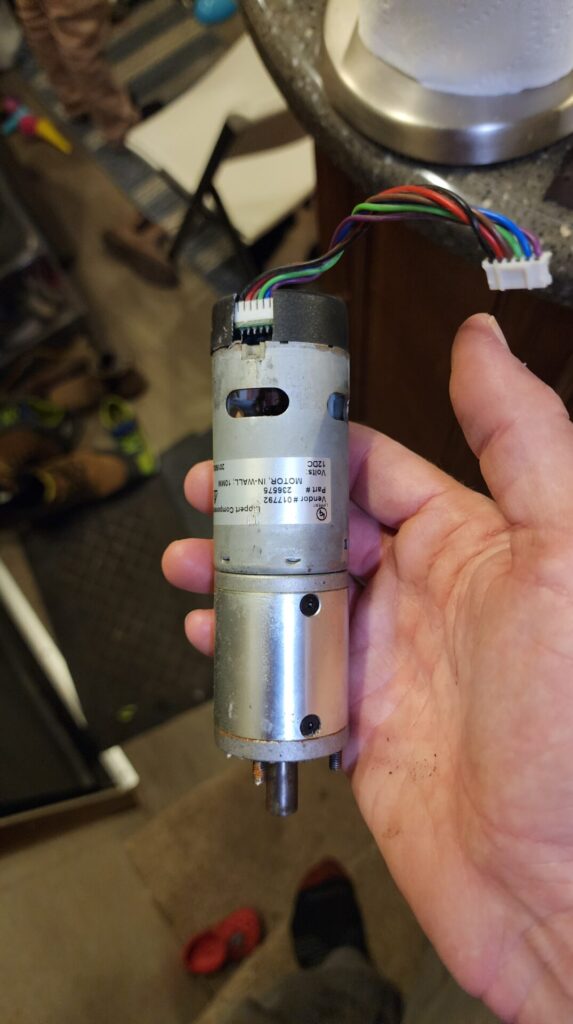
Once we arrived in Texas, I ran over to my brother’s house and picked up the replacement slide motors that I’d ordered. I’d looked up how to replace the motor and it seemed fairly straight forward.
I had already removed the retention screw on the outside and popped it up out of the drive socket to push the slide in. I had Meagan drive the slide out while I pushed on the dead side about halfway out, to facilitate access to where the motor was, at the top right corner of the slide.
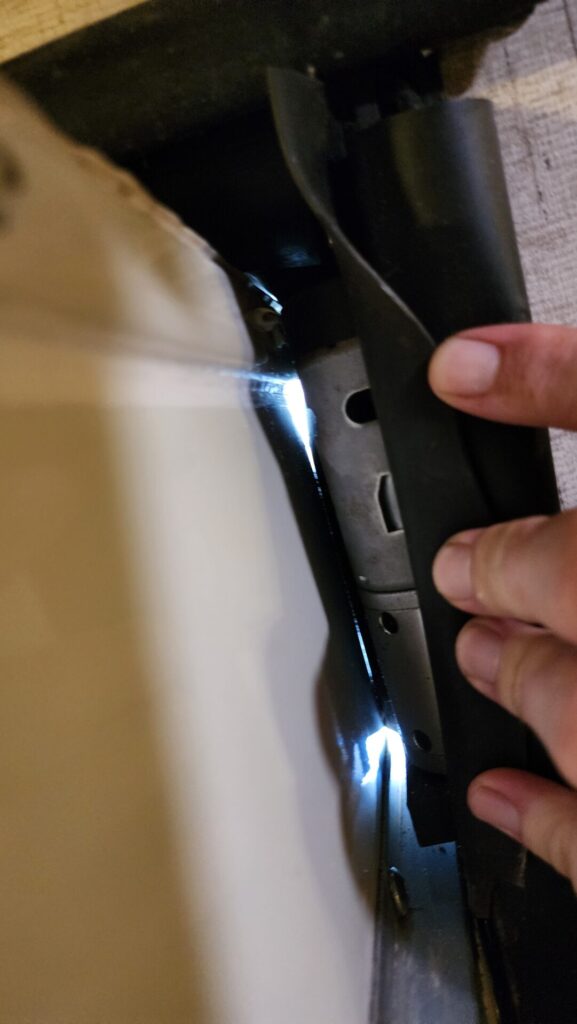
It took a little finagling, but I did get the motor out. I got the new motor in, but was having some trouble getting it lined up and seated. I had Meagan pulse the drive switch briefly. The motor spun and seated itself and then we were able to operate the slide normally!
I put in the retention screw on the outside and fixed the bulb seals and we were back in business!
The Toilet
The morning after we arrived in Texas, the toilet flush arm mechanism broke. While normally annoying, this would prove to be problematic, especially as we all had traveler’s diarrhea in various stages. Saturday morning Meagan and the kids went over to visit and hang out at my brother’s place. Unfortunately, we didn’t make it through the night without an incident. The cherry on top was that we didn’t have the bathroom code handy, so the shower had to be utilized on an emergency basis 💩!
I called around to all the local RV dealers and found one that had the required part in stock, about 45 minutes away. It proved to be a good test of the truck, as I got some additional information on the transmission overheating issue. It continued to build temperature, but not nearly as fast while towing, while I drove down and back.
Sunday morning I got after the toilet and its broken flush valve. A year ago I replaced the seals on the toilet, so I am somewhat familiar with the process of pulling the toilet and taking it apart. However, I needed to access the ball valve flush mechanism, which was a bit more involved.
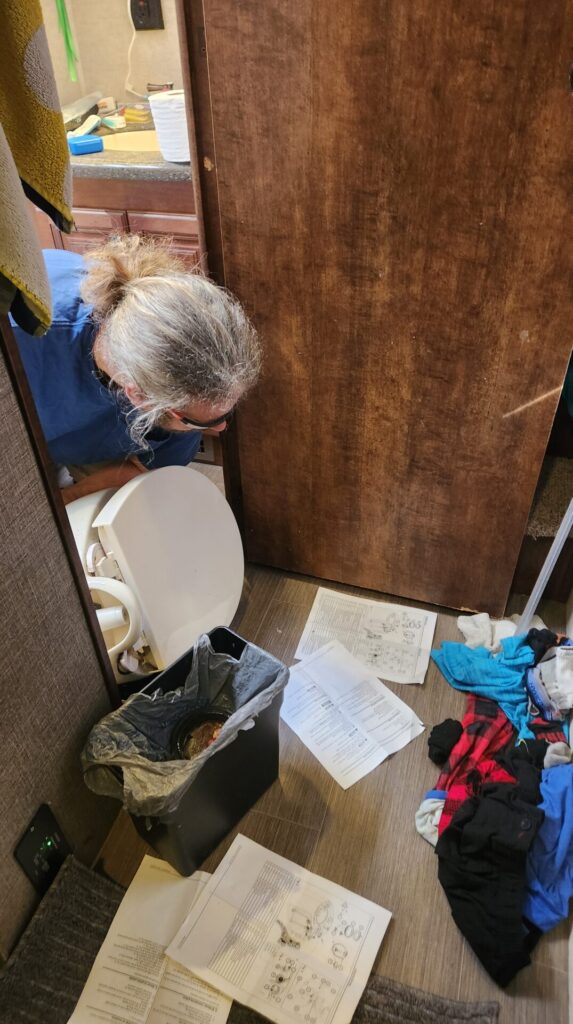
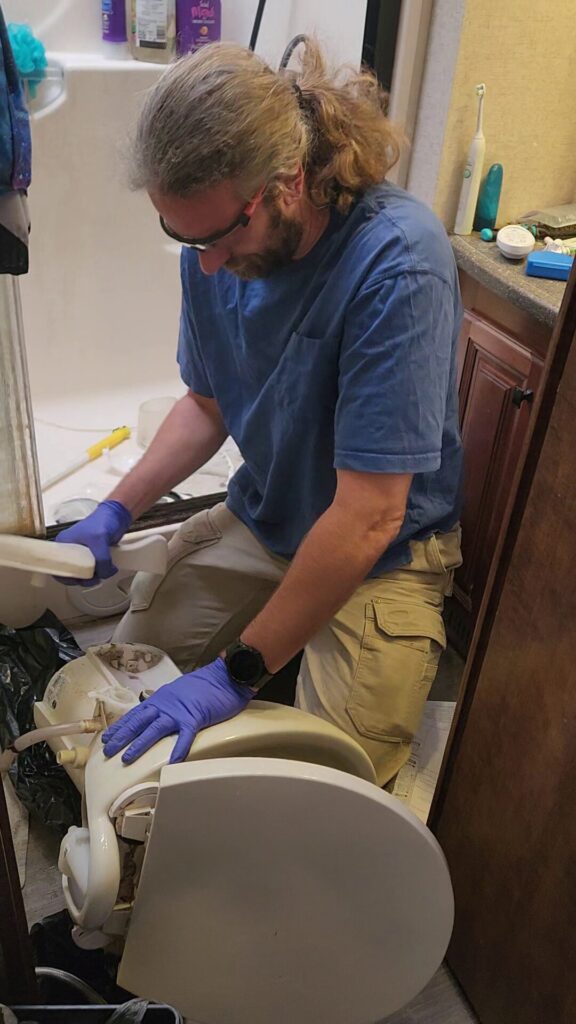
To access the screw that holds it in, I pulled off the flush lever, being careful to not further break the toilet. Fortunately, it all went well. A side effect of this process was to replace the seals again. The Amazon special seals I had used earlier were leaking again – the toilet would not hold water in the bowl. After this project, I cleaned some extra gunk off the parts and it went together well and everything is working as it should.
Trailer Bearings and Brakes
Back in Florida, during my trailer preps, I noticed that one of the axles had basically black grease come out, where the other three were of a normal color. This indicated that the bearing got rather hot to burn the grease. I was unable to get the parts in time for the trip, due to it being Easter weekend before our departure. Lesson to self – do the big maintenance items earlier!
I ordered a new bearing and hub assembly from etrailer.com and it was waiting for me as well. Once I got the rest of the materials and was feeling up to it from my intestinal distress, I swapped out the hub.
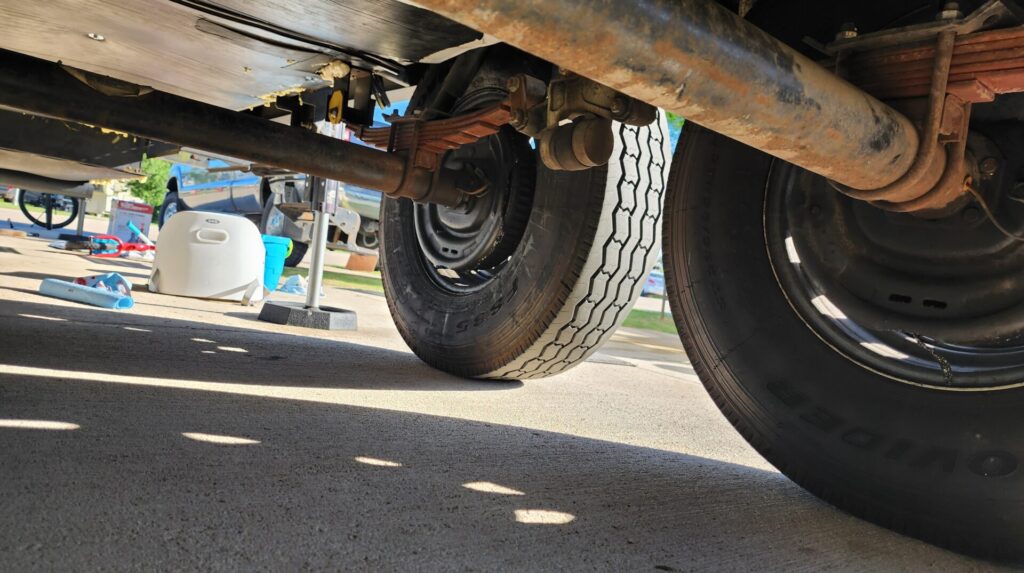
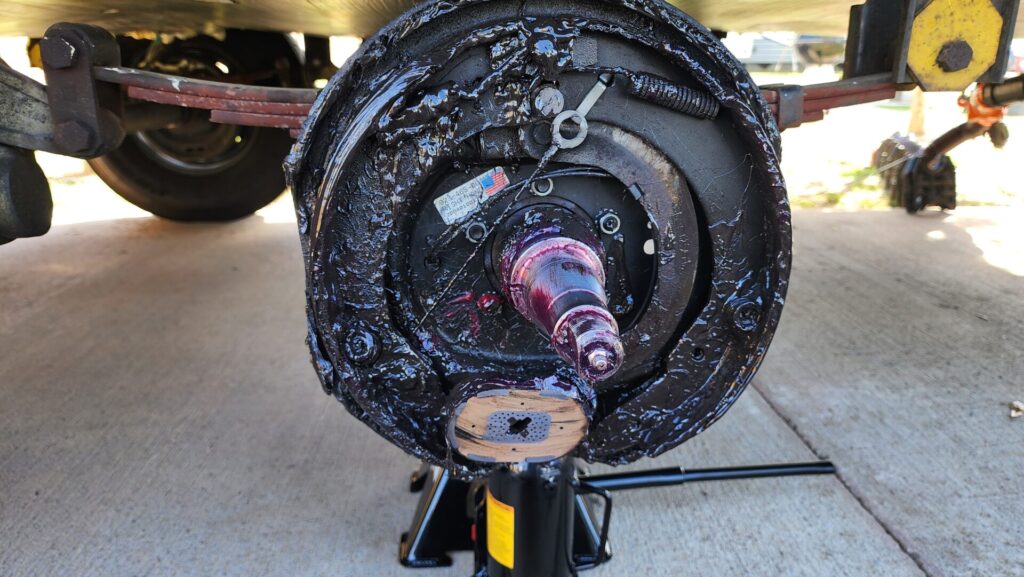
This whole process went pretty smoothly. While I was down there, I noticed that the other wheels showed signs of grease. On the morning that we pulled out from Rose City, Texas, my brake check was not very effective. So some additional work was needed on the other wheels to inspect what was going on.
A few days later, I was feeling better. We were also out of time. We extended our stay in Austin due to the stomach bug we all were dealing with and cut out the Waco portion of the trip. This left me with Friday,12 April to get it figured out, before our planned departure on Saturday morning. Also, if I didn’t get it fixed on Friday, we were going to have to extend to Monday or Tuesday the next week, since the parts stores would be closed.
When I pulled the hub on the right side, I saw why the brake check didn’t work out so well. Everything was covered in grease, and various bits of the self adjusting brake assembly basically fell out or were freely moving around inside the drum. I also found the brake wires were broken, so even if the parts were intact, the brakes would not engage. Fortunately, the trip up north went smoothly and we had no issues with braking.
I made the first of three trips to Magnum Trailers to pick up bearings. I called the RV dealerships around and they did not have parts in stock, but they would be able to order them and have them next week. They did recommend a trailer shop who did in fact have them all in stock. So, if I need brakes, bearings, or other hub parts in the future, check out the trailer stores. They were cheaper than the RV dealer as well.
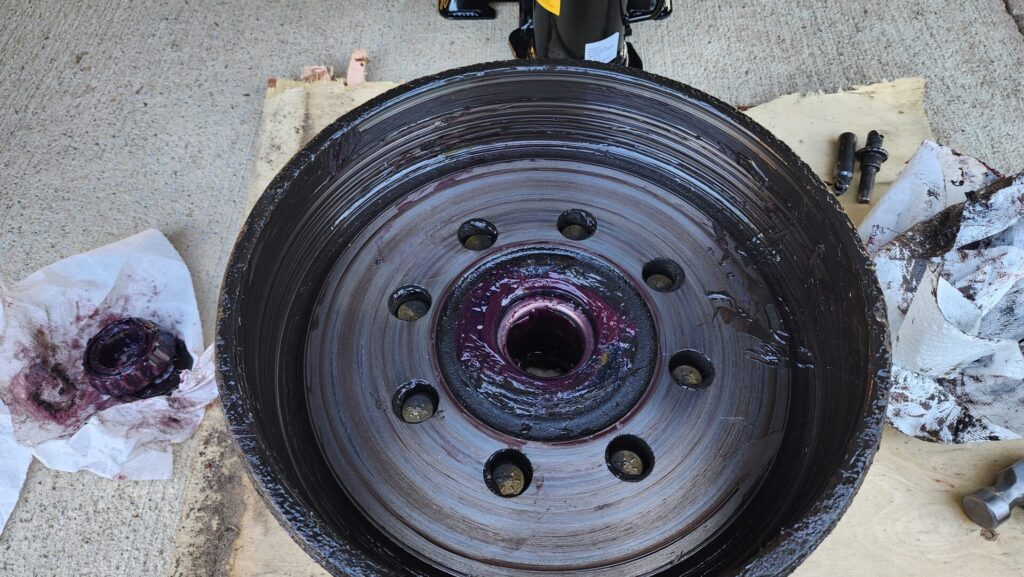
I had the great idea to just replace the bearings. So, I had picked them up and then opened the hub. After discovering the unknown joy of a broken wheel, and spending a fair amount of time and effort to clean out the hub, I decided to replace the hub and get new brakes for all the wheels. The trailer was approaching 10 years, and while it hadn’t driven all that many miles, it was time for new brakes.
Another trip to the store to pick up hubs and brakes. I got the first bearing out and the new bearing in with a brass punch set that I ordered from Amazon. Not too difficult. Got started on the second hub, and I could not get it out. As I progressed in my efforts, the brass punches were being slowly destroyed, which is by design. The brass is softer than the steel of the bearings and hubs, and would not damage it, but I was not getting anywhere. It was getting late in the day, and I called the trailer shop again and asked if they had kits with the hubs and bearings pre-installed. They did. Wonderful. Next time it comes time to replace the bearings, I’m just going with a hub kit because it wasn’t worth the time and effort to drive out the bearings and then drive in the new ones.
My brother drove me to the store, which was good, as I was now a bit dehydrated and sun baked from working on the trailer all day in the Texas heat. We got there just in time to pick up the parts 5 minutes before they closed for the day.
Back at the RV park with the new hub kits, the installation went smoothly and everything op checked – the wheels stopped when the brake controller was engaged.
Future brake checks with the trailer indicated positive resistance and it got better as the trailer brakes adjusted themselves to the correct tension.
The Truck
There were two issues with my truck that needed to be addressed. First, was the Transmission Temp issue. The second was the tune, or software program on the truck.
On the way up from Rose City, TX to Round Rock, TX, the truck’s TFT started to rise and not cool back down. By the end of the trip, a mere 20 miles from the camp ground, I was making repeated stops to let the TFT cool as it was right on the border line of overheating. Buying a new transmission was not on my short list of things to do on this trip.
The transmission fluid is cooled by a secondary cooling system on the truck. I took the truck back to Diesel Performance in Round Rock, TX. I took the truck there two years ago when the EGT sensors were failing and caused us to be stuck for a few more days. They did a great job and found that the secondary system was leaking. Leaks fixed, water pump replaced, and I had them add an additional transmission fluid cooler. On subsequent drives, the Transmission Fluid Temperature (TFT) stayed rock solid.
The other issue the truck had was the tune. First Coast Diesel Performance did some pre-trip work on my truck – there was a coolant leak in the primary system and they additionally found some other issues and oil leaks. I asked them to upgrade the turbo and fuel pump, which had known reliability issues. This, however, meant that I could no longer use the Edge tuner and their towing tune which was for stock trucks only.
I lined up a new custom tune for towing and the truck has been doing better. There is still a nuisance code to figure out that intermittently comes on with no apparent reason. The tuning shop seems to think that it could be a loose wiring harness.
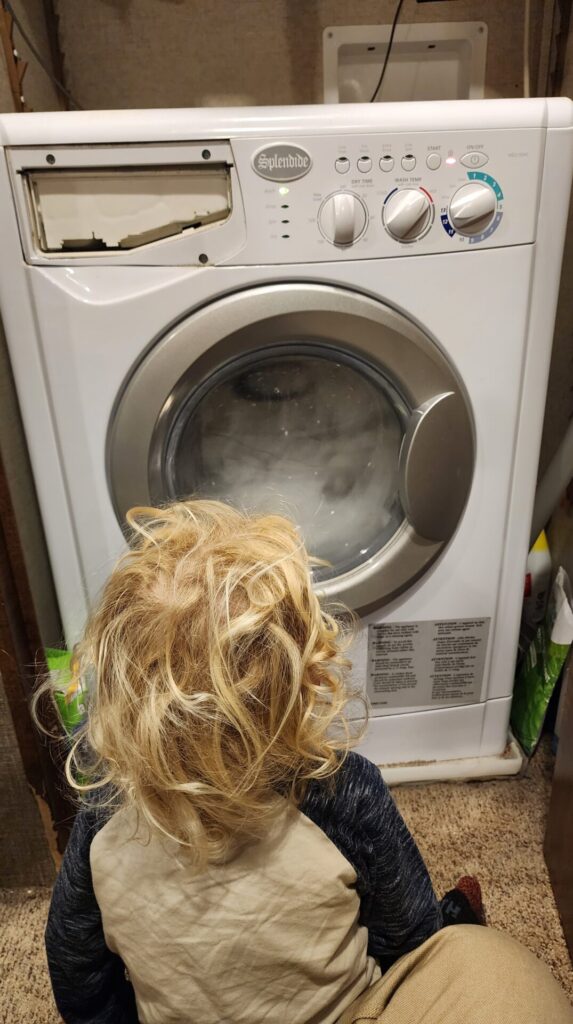
Washer maintenance
One of the things I do every month is clean out the washer with an Affresh tab. This helps break up the lint and other gunk that accumulates in the washer. We have a Splendidie combo unit, and if you do not maintain it the dryer vent gets clogged up and drying performance suffers greatly.
The process is to run several partial wash cycles with hot water to fill the tub, then drain, and wipe out the tub. I do this three times.
Garrett helped me on this time. He was quite mesmerized by the whole process.
After the cycle is done, I wipe it out with paper towels. Here is what broke free with the Affresh tabs.
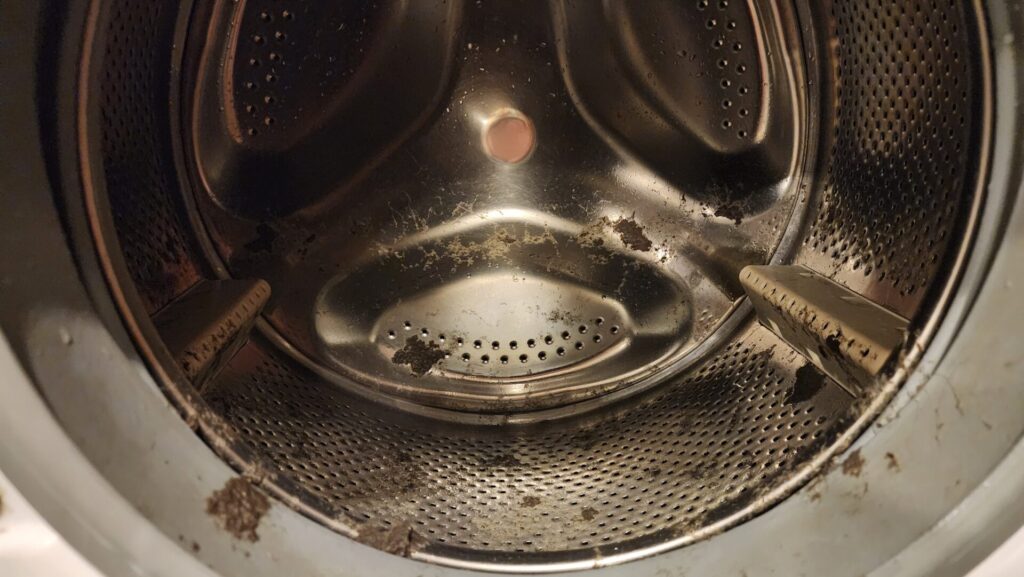
All in all, this takes about 15 minutes once a month.
Power Cord
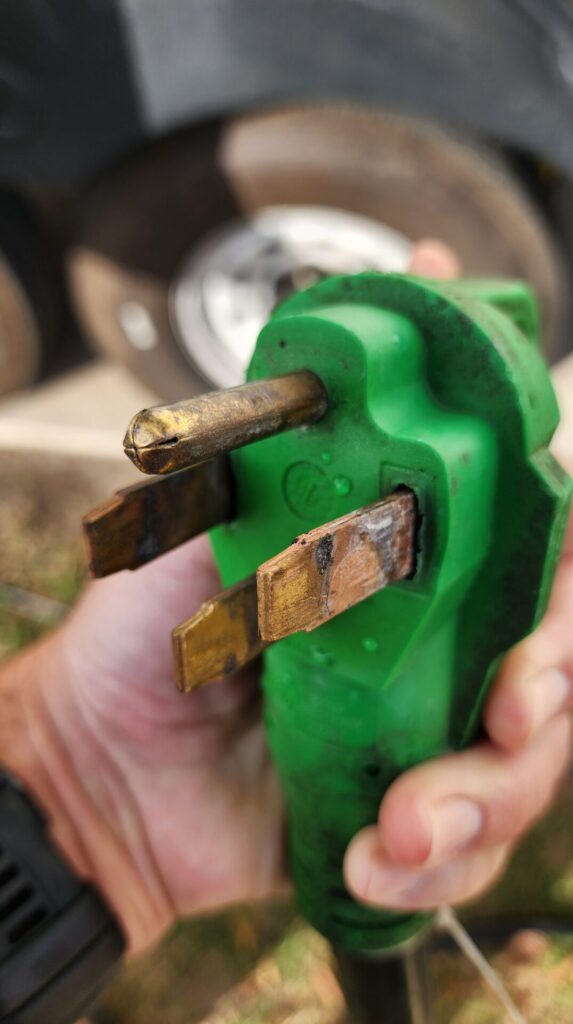
At one of the stops on the way out from Florida to Texas, I noticed that our power cord was a little warm when I went to unplug it. As you can see in the photo above, there was some heat damage and corrosion on the tines. I ordered a new power cord to replace this one. RV fires are not high on my list. I could have replaced the ends, but I chose to just eliminate this risk.
Jack pad
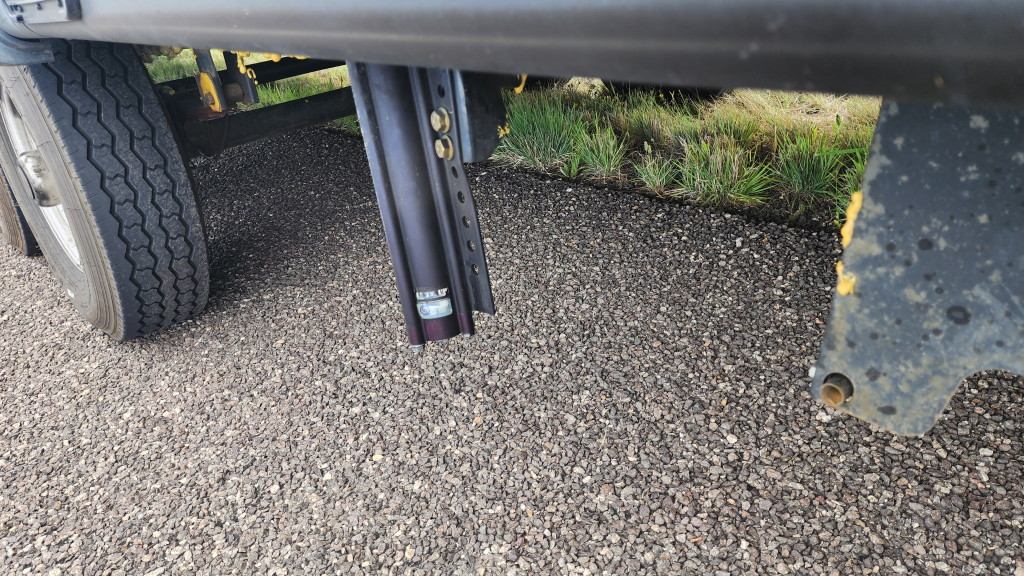
While we were driving from Ft. Davis, TX to Carlsbad, NM we lost one of our jack pads. It just decided to depart the trailer. Fortunately, no one was hurt and it did not impact a vehicle. We saw it come off while driving on the highway. Both Meagan and I went back and looked for the parts, but we could not find them. I ordered a new one and it met us in Carlsbad, where Meagan and I installed it.
That concludes this month’s Fix it post. Stay tuned for more adventures with us on our trip!
To get notifications of posts, please register on the site and you will get notifications of new posts via email.
User registrations have been disabled for the time being until I get the spam registrations figured out. For the time being, please use your patreon account to log in.
You can support us via buymeacoffee or via our patreon.
Sounds like if you want to, you can open your own repair shop with all that you have learned! You are amazingly handy with all of the mechanical problems!